A Modern Full Stack REST Application
Plaid is a popular API that exposes a user's banking information through REST endpoints. We will make use of their service to create a REST API to create authorization information. We will then create a React application that consumes the API to create auth tokens for a user. This tutorial assumes familiarity with React and full-stack development. The repo for this can be found here:
A quickstart for setting up Plaid server and React client - https://github.com/qweliant/BetterPlaidQuickstart
Getting Started with Plaid API Keys
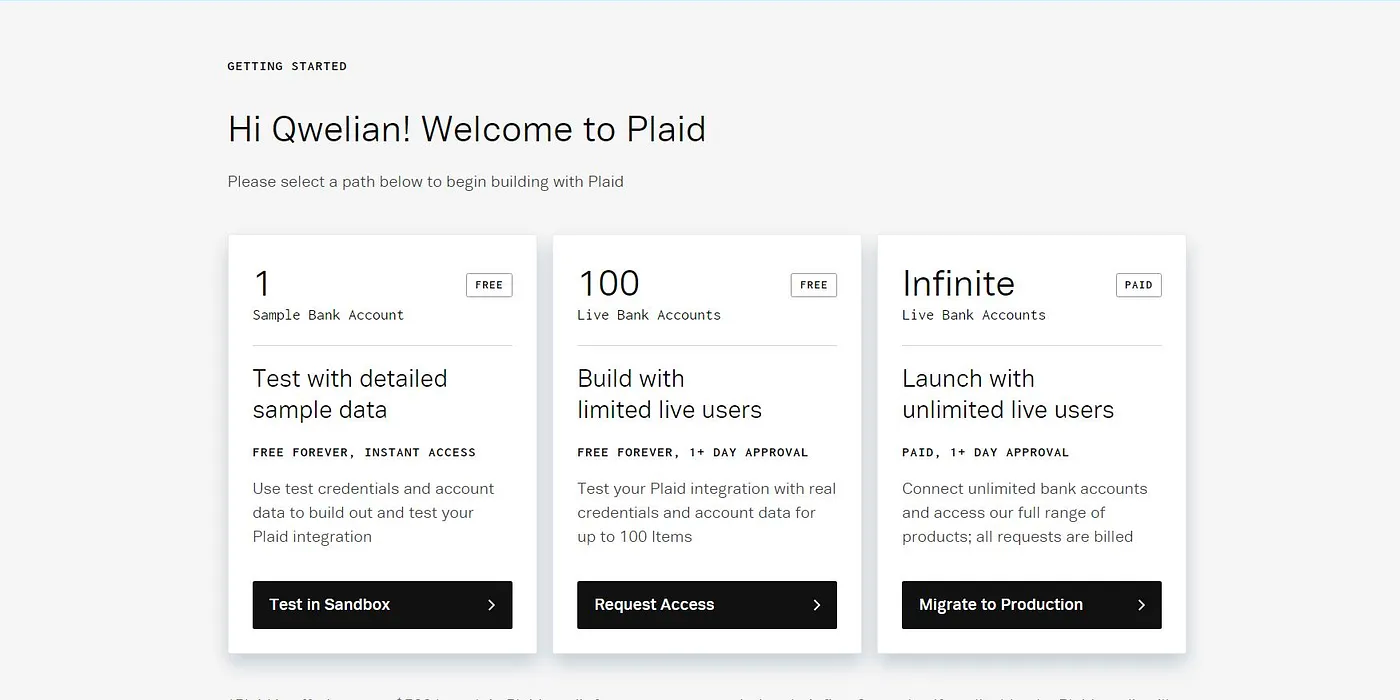
To get started, we need to head over to Plaid for our API keys.
Navigate to the Settings tab and click Keys to view your API keys.
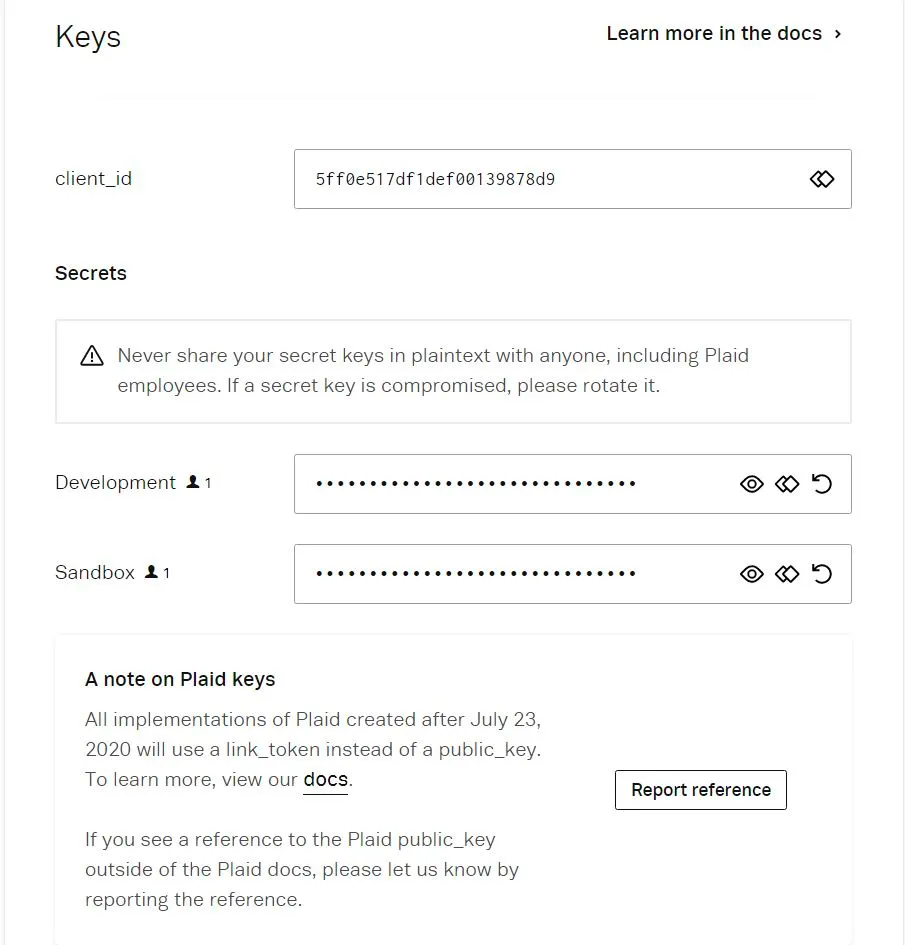
Creds from Plaid
We will use the sandbox environment, which uses a different key for testing than development. Notice on the left sidebar a tab that says API. Click on
that and you will see the section about Plaid's redirect URI. Click on Add New URI and add http://localhost:80 and http://localhost:3000.
This will control where the redirect after linking happens. If you click on the Test in Sandbox button seen on the landing page, you will
be taken to a page showing the test user credentials.
Quickstart repos exist for multiple languages. You can use your language of choice for this project since the client is backend agnostic.
Backend Setup
We won't necessarily run the exact setup they have, but next, we will walk through setting up the backend via the Go Not So Quickstart Repo.
1. Create Project and Clone Repository
git clone https://github.com/plaid/quickstart.git2. Clean Up Repository
Delete the Makefile, README, and every folder except the go one.
Docker Configuration
These come preconfigured with a Dockerfile to make deployment easy. We won't be covering deployment of Docker containers, but we will be spinning them up using Docker for Desktop. If you need to install, check out Docker for installation instructions per your OS. This will be a pretty simple docker set up that is noob friendly, so you should be able to understand the basics following along.
Edit docker-compose.yml
version: "3.4"

services:
  go:
    build:
      context: .
      dockerfile: ./go/Dockerfile
    ports:
      - "8000:8000"
    env_file:
      - .env
Build and Run
Running:
docker-compose up -d --buildwill build the image and start a container. If we look at the Dockerfile we can see how our application is being built. The go version is specified for the official go image. A directory is then created that we copy everything into. After changing the root directory to the go folder, we get the required packages and build the binary. Next we pull the image that our binary will run on, copy the binary into the image, and expose the app via port 8000. By the way, you should delete the lines that copy html and static info over. Our Dockerfile should look similar to this
Go Dockerfile
FROM golang:1.12 AS build
WORKDIR /opt/src
COPY . .
WORKDIR /opt/src/go
RUN go get -d -v ./...
RUN go build -o quickstart

FROM gcr.io/distroless/base-debian10
COPY --from=build /opt/src/go/quickstart /
EXPOSE 8000
ENTRYPOINT ["/quickstart"]
Environment Configuration
If you ran the above docker-compose command you should expect to see warnings about your env variables or errors if you have not already deleted the html and static copy. Let's create an .env file in the same folder as the docker-compose file. This file will define your plaid credentials. The result should be something like:
# Get your Plaid API keys from the dashboard: https://dashboard.plaid.com/account/keys
PLAID_CLIENT_ID=CLIENT_ID
PLAID_SECRET=SANDBOX_SECRET
PLAID_ENV=sandbox
PLAID_PRODUCTS=transactions
PLAID_COUNTRY_CODES=US,CA
PLAID_REDIRECT_URI=http://localhost:80
Server Configuration
The last thing we should do before moving on to the frontend is edit some portions of the code in server.go. This is because the quickstart repo does not behave as one would expect. This may be due to my own ignorance but following the steps in the official repo lead to an environment error.
Attaching to quickstart_go_1go_1 | Error loading .env file. Did you copy .env.example to .env and fill it out?Edit the server.go file to look like this:
var (
    PLAID_CLIENT_ID = os.Getenv("PLAID_CLIENT_ID")
    PLAID_SECRET = os.Getenv("PLAID_SECRET")
    PLAID_ENV = os.Getenv("PLAID_ENV")
    PLAID_PRODUCTS = os.Getenv("PLAID_PRODUCTS")
    PLAID_COUNTRY_CODES = os.Getenv("PLAID_COUNTRY_CODES")
    PLAID_REDIRECT_URI = os.Getenv("PLAID_REDIRECT_URI")
    APP_PORT = os.Getenv("APP_PORT")
)

var environments = map[string]plaid.Environment{
    "sandbox": plaid.Sandbox,
    "development": plaid.Development,
    "production": plaid.Production,
}

func init() {
  func main() { r := gin.Default() r.POST("/api/info", info)
}
Running the docker-compose command again will start the API. Now is a good time to step away for water or a quick walk. Next we will walk through our react setup. Our penultimate creation will result in a button that performs Oauth for thousands of bank accounts.
Frontend Setup
Create React App
Alright, we’re back, refreshed, hydrated, and ready for the front end. Start the app by running npx create-react-app plaid in the parent directory our go folder is in
npx create-react-app plaidWe’ll start by getting the Dockerfile set up for the frontend and adding the client service to our docker compose file. Let's start the latter part by opening the docker-compose file again. To add a service for the client, simply add it after the go section. The file will change to look something like this:
version: "3.8"

services:
  go:
    env_file:
      - .env
    build:
      context: .
      dockerfile: ./go/Dockerfile
    ports:
      - "8000:8000"
    restart: on-failure

  client:
    stdin_open: true
    env_file:
      - .env
    build:
      context: .
      dockerfile: ./plaid/Dockerfile
    ports:
      - 80:80
    restart: on-failure
React Dockerfile
Next we wanna add a Dockerfile to the plaid directory. In it we define steps for building the production react app and placing it on an nginx webserver. The Dockerfile for this will be:
# STAGE 1 - build the react app
FROM node:alpine as build
WORKDIR /app
COPY ./package.json /app/
RUN yarn --silent
COPY . /app
RUN yarn build

# STAGE 2 - build the final image using a nginx web server
FROM nginx:alpine
COPY --from=build /app/build /usr/share/nginx/html
RUN rm /etc/nginx/conf.d/default.conf
COPY nginx/nginx.conf /etc/nginx/conf.d
EXPOSE 80
CMD ["nginx", "-g", "daemon off;"]
Nginx Configuration
Next, we need to create a folder for nginx that configures the server. Name the folder nginx and add a file named conf.d. This configures our server to serve the static build(html, js, css, etc) on port 80 in the container.
Create nginx/nginx.conf:
server {
    listen 80;
    location / {
        root /usr/share/nginx/html;
        index index.html index.htm;
        try_files $uri $uri/ /index.html;
    }
    error_page 500 502 503 504 /50x.html;
    location = /50x.html {
        root /usr/share/nginx/html;
    }
}
Try running docker-compose up -d --build now to see if the hello world react app is
being hosted on port 80. Something to note is the port our app is served on.
Since the redirect uri is needed for browser navigation after login, you will
need to resolve the uri for dev vs container environments. That may be making
a separate docker-compose and Dockerfile setup, or by changing the uri in the
env from 80 to 3000. I will leave it to you
Install Dependencies
We now need to add axios and the react-plaid library to handle state and client/server communication. Make sure you are in the plaid directory created and run:
yarn add axios react-plaid-linkCreate Link.js
Let’s now open the src folder and add a file named Link.js. Here is where the logic for making the link will be created. The link process in the react plaid hooks library makes it pretty easy to perform auth. With it, we will call /api/create_link_token to get a link token from Plaid. This will initialize the Plaid auth link flow for a users bank account. If the user successfully links, an access token will be generated. The access token needs to be persisted permanently in your DB of choice for access to different Plaid endpoints. For now it is stored as a value on the server. Copy the code below to your Link.js file
import React, { useState, useCallback, useEffect } from "react";
import { usePlaidLink } from "react-plaid-link";
import axios from "axios";
import qs from "qs";

const tokenURL = "http://localhost:8000/api/create_link_token";
const sendTokenURL = "http://localhost:8000/api/set_access_token";

const Link = () => {
  const [data, setData] = useState("");

  const fetchToken = useCallback(async () => {
    const config = {
      method: "post",
      url: tokenURL,
    };
    const res = await axios(config);
    console.log(res);
    setData(res.data.link_token);
  }, []);

  useEffect(() => {
    fetchToken();
  }, [fetchToken]);

  const onSuccess = useCallback(async (token, metadata) => {
    const config = {
      method: "post",
      url: sendTokenURL,
      data: qs.stringify({ public_token: token }),
      headers: { "content-type": "application/json" },
    };
    try {
      const response = await axios(config);
      console.log(response);
    } catch (error) {
      console.error(error);
    }
  }, []);

  const config = {
    token: data,
    onSuccess,
  };

  const { open, ready, err } = usePlaidLink(config);

  if (err) return "Error!";

  return (
    <button onClick={() => open()} disabled={!ready}>
      Connect a bank account
    </button>
  );
};

export default Link;
Run the Application
docker-compose upAfter running docker-compose up -d --build you should be able to go to localhost:80 and connect a dummy account.
Congrats! You are now on your way to implementing a fintech banking as a service application. Kinda like...BaaS...Ok ok. Thank you for viewing. Have a wonderful day!