Building an Open-Source Safety Net for Home Hemodialysis
Home hemodialysis gives patients their lives back but it introduces the risk of isolation. If a patient's blood pressure crashes or a line disconnects while their care partner is in the other room asleep, the machine sounds an alarm, but it only beeps in the room. It doesn't text the spouse, it doesn't alert the clinic, and it doesn't notify emergency contacts.
I lost my mother to a disconnect in home care. I built Safehemo to be the digital support system I wish we had. Here is a breakdown of how I built an open-source, real-time care network and IoT simulation pipeline using Elixir, Phoenix LiveView, and Rust.
Why Elixir and Phoenix?
When dealing with medical telemetry the system needs to be highly concurrent, fault-tolerant, and capable of real-time state management. The language I chose also needed to support embedded devices natively. The architectural goal is that the physical medical devices themselves can eventually run the same stack (via frameworks like Nerves). This allows us to push data, offload processing, and even debug hardware remotely without relying on a single, fragile point of interaction. I chose Elixir and Phoenix LiveView because the BEAM was created to run tens of thousands of devices.
BEAM
I have been looking for any reason to use Elixir since seeing this talk on LiveView by Sophie DeBenedetto. Elixir is a functional programming language designed by José Valim in 2012. It is built on top of the BEAM virtual machine originally engineered by Ericsson in the 1980s and 90s to run massive, highly reliable telecom networks. The work on the BEAM VM required fault tolerance and concurrency. Dropping calls is not cool. The language I wanted also needed to be able to support embedded devices. The idea is, theoretically I suppose, that each device could natively support pushing data through the system I imagined, allowing data processing and device debugging to be offloaded from a single point of interaction.
Other languages I evaluated were Go, TypeScript, and python. Any of
these tools could be built to run concurrent, fault tolerant systems
(see the c10k problem). Go was
interesting because I had used it before and wanted to explore how its
concurrency primitives enable true parallelism. Go is genuinely
strong for embedded work. It compiles to a single static binary,
cross-compiles to ARM and has lower raw memory overhead than
the BEAM. But those strengths are most valuable for CPU-bound,
single-purpose tools. For a distributed IoT system that needs
"five nines" uptime, preemptive scheduling across thousands of
concurrent connections, and the ability to hot-patch a deployed device
without a full restart, Go's shared-memory runtime and lack of a
supervision tree become real liabilities. Elixir's Nerves project
provides an integrated stack from hardware to web UI while
the BEAM's iex --remsh lets me connect to a running device in
production for live debugging. Go does not do that. Plus I am lazy and don't want to build a custom WebSocket server or background job processor.
TypeScript was appealing because I am proficient with it, but the modern Next.js/React ecosystem treats WebSockets as a second-class citizen, favoring serverless HTTP. I could have spun up a custom Node/Express server for WebSockets, but scaling Node requires introducing a Redis pubsub backplane to sync state across instances. Python would be a strong choice for its ML library dominance but to get real-time WebSockets and background tasks working in a Django/ASGI environment, we'd need to add Redis, Celery, and potentially RabbitMQ.
By choosing Elixir, I get concurrent real-time connections via the
BEAM's actor model
with PubSub between processes, stateful servers, and background
processors built in.
GenServers
To enable this architecture, Elixir ships with OTP (Open Telecom
Platform). OTP is a standard library that includes all the tools you
would need to add onto most languages. It gives us native primitives for
real time distributed processing via modules such as GenServers for
state, Task for background jobs, Registries for fast process look
up, and Supervisors to manage process lifecycles. The system should start a new GenServer, allow
our GenServer to spawn background Task for asynchronous data handling,
add our GenServer to a Registry for fast lookup, and a Supervisor to
instantly restart crashed processes.
GenServers are stateful, isolated micro-processes. Because they hold state in memory we do not have to constantly read/write data to a Redis cache or Postgres database just to calculate some value. If the connection drops, the state is preserved in memory (the GenServer crashing and losing state is a very different story), so the accumulated readings and thresholds remain intact. This is crucial for calculating anomalies and determining when to trigger alerts. The GenServer's state is also where we store the patient's custom thresholds for each vital sign. This allows us to compare incoming telemetry data against the patient's unique baselines in real-time, without needing to query the database on every reading.
Here is a simplified look at how the (you should be wondering what makes a process spawn) device GenServer handles a new telemetry payload in real-time:
def handle_cast({:new_reading, payload}, state) do
  # 1. Parse incoming MQTT payload based on device type
  reading = parse_payload(payload, state.device.type)

  # 2. Check for anomalies against the patient's custom thresholds
  violations = Ankaa.Monitoring.ThresholdChecker.check(reading, state.thresholds)

  # 3. Determine if we need to escalate based on previous state
  # (e.g., Is this a new anomaly? Has the "nag timer" expired?)
  {new_state, should_alert?} = evaluate_alert_state(state, violations)

  if should_alert? do
    Logger.info("Triggering Alert for Patient #{state.patient.id}")
    Ankaa.Alerts.create_alerts_for_violations(state.patient, violations)
  end

  # 4. Instantly broadcast the new reading to the Phoenix LiveView dashboard
  Phoenix.PubSub.broadcast(
    Ankaa.PubSub,
    "patient:#{state.patient.id}:devicereading",
    {:new_reading, reading, violations}
  )

  # 5. Spin off an async Task to save to the DB so we don't block the GenServer loop
  Task.start(fn -> Ankaa.Monitoring.save_reading(state.device, reading) end)

  # 6. Keep the GenServer alive with the newly updated memory state
  {:noreply, new_state}
end
If you look at the bottom of that handle_cast function, you'll notice
two crucial BEAM features that keep the system non-blocking and
real-time: Task for background processing and Phoenix.PubSub for
instant message broadcasting across the cluster.
Task
The GenServer's primary job is keeping the state in memory and
calculating anomalies. Writing to a PostgreSQL database is comparatively
slow. Instead of blocking the GenServer while we wait for the database
to acknowledge the write, we spin up an asynchronous Task. This fires
off a lightweight background process to handle the database insert,
freeing up the GenServer to catch the next set of incoming device data.
In other languages, you'd have to set up Celery or Sidekiq for this.
In Elixir, it's just Task.start/1.
Instant Alerts and Phoenix.PubSub
Let's assume someone's blood pressure has dropped and a violation is
created. When Ankaa.Monitoring.ThresholdChecker.check/2 catches a
hypotensive drop, Phoenix.PubSub instantly broadcasts the event across
every process. Sometimes these processes are referred to as clusters.
When the message is published to a topic, the GenServer doesn't need to
know who is looking at a screen or how to send an SMS. It simply
broadcasts the event to Phoenix.PubSub.
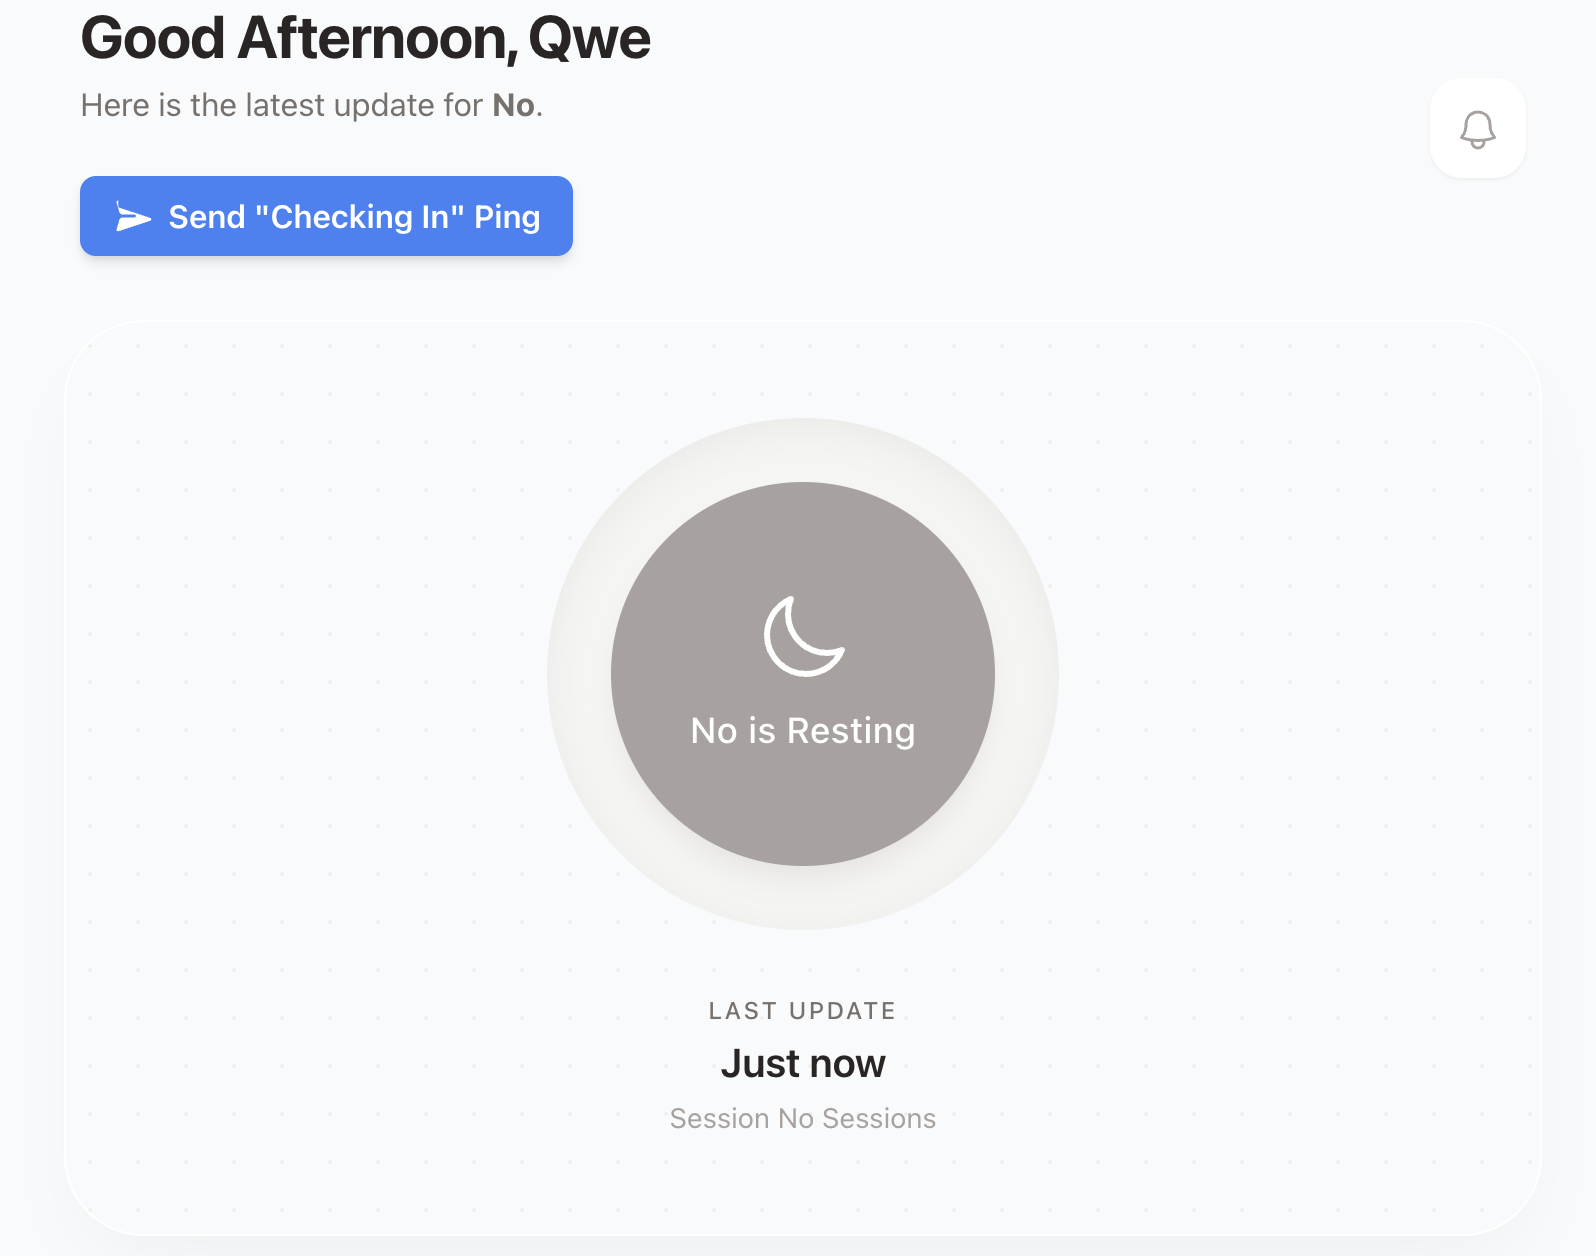
Because the BEAM's distribution layer allows nodes to communicate as if they were local processes, this message instantly ripples across the cluster without needing Redis. LiveView dashboards subscribed to that topic update instantly, and background workers catch the event to fire off SMS alerts to the patient's care network. This concurrently updates the Patient's LiveView dashboard, triggers an async worker to SMS the Care Partner, and flashes an alert on the Clinic's workspace.
Registries & Supervisors
Fault tolerance , in the context of Elixir, is the ability for the system to heal from going down without losing the state of a failed process. A medical device losing WI-FI, disconnecting, or throwing an error are all states that could crash a server. This is where Registries and Supervisors come in.
When an MQTT payload hits our server, we don't have to query the database to find out if that patient has an active session. Instead, we use a Registry, Elixir's in-memory concurrent phonebook for our BEAM processes.
If a device isn't in the Registry (meaning it just came online), we spin up a new GenServer for it using a DynamicSupervisor. If that GenServer ever hits an unhandled exception and crashes, the Supervisor's "let it crash" philosophy kicks in, instantly restarting the process to a clean, known state.
Here is the MQTT handler that routes incoming traffic, checking the Registry and relying on the Supervisor to boot new sessions:
def handle_info({:publish, %{topic: topic, payload: payload}}, state) do
  # 1.Extract the device UUID from the MQTT topic string
  [_, device_uuid, _] = String.split(to_string(topic), "/")

  # 2. Check the Registry (our in-memory phonebook) for an active session
  case Registry.lookup(Ankaa.Monitoring.DeviceRegistry, device_uuid) do

    # CASE A: The device is already online and has an active GenServer
    [{pid, _}] ->
      Ankaa.Monitoring.DeviceServer.handle_reading(pid, payload)

    # CASE B: No active session found. We need to wake one up.
    [] ->
      spawn_and_route(device_uuid, payload)
  end

  {:noreply, state}
end

# Helper function to safely boot a new device session
defp spawn_and_route(device_uuid, payload) do
  # Verify the device actually exists in our database before giving it memory
  case Ankaa.Devices.get_device(device_uuid) do
    %Ankaa.Patients.Device{} = device ->

      # Ask the DynamicSupervisor to boot a new, supervised GenServer for this device
      case DynamicSupervisor.start_child(Ankaa.Monitoring.DeviceSupervisor, {Ankaa.Monitoring.DeviceServer, device}) do
        {:ok, _pid} ->
          Ankaa.Monitoring.DeviceServer.handle_reading(device_uuid, payload)

        # Handle the race condition where it started between our lookup and here
        {:error, {:already_started, _pid}} ->
          Ankaa.Monitoring.DeviceServer.handle_reading(device_uuid, payload)

        {:error, reason} ->
          Logger.error("Supervisor failed to start worker: #{inspect(reason)}")
      end

    nil ->
      Logger.warning("Ignoring MQTT message for unregistered device: #{device_uuid}")
  end
end
Architecture Highlights
The Rust IoT Simulator
So yeah, I do not own a dialysis machine. Purchasing a proprietary NxStage NX0740-P0 Box Module just to test my data pipeline wasn't exactly in the budget, and even if it was, proprietary medical devices do not have friendly, open APIs. This meant I had to get creative with my data flow. To test the data pipeline, I vibe coded a mock IoT server in Rust. It streams simulated, medically-plausible telemetry data. I designed it so that It injects configurable anomalies ( sudden hypotensive drops or gradual venous pressure climbs) or normal vitals.
The rust IoT server communicates with the Elixir backend, proving out
the data-ingestion architecture for future integrations with consumer
wearables (like Bluetooth BP cuffs). I wanted the mock IoT simulator to
simulate thousands of concurrent devices streaming data. The simulator
subscribes to an MQTT control topic (ankaa/simulator/control). The
Elixir backend can publish a JSON command to this topic to tell Rust to
spin up a new device simulation on the fly. When a Start command is
received, Rust spawns a lightweight tokio::task for that specific
device. It stores the thread handle in a DashMap (a fast, concurrent
hash map). If a Stop command is received, Rust pulls the handle from
the DashMap and aborts the task, instantly flatlining the simulation.
// The Control Loop: Listening for Start/Stop commands via MQTT
loop {
    let notification = eventloop.poll().await?;

    if let rumqttc::Event::Incoming(rumqttc::Incoming::Publish(publish)) = notification {
        if publish.topic == "ankaa/simulator/control" {

            // Parse the incoming JSON command from Elixir
            let command: SimulatorCommand = match serde_json::from_slice(&publish.payload) {
                Ok(cmd) => cmd,
                Err(e) => {
                    error!("Failed to parse command JSON: {}", e);
                    continue;
                }
            };

            match command {
                SimulatorCommand::Start { start_simulations } => {
                    info!("Received START command for {} devices.", start_simulations.len());

                    for device_config in start_simulations {
                        let client_clone = client.clone();
                        let config_clone = config.clone();
                        let sims_map_clone = running_simulations.clone();
                        let device_id = device_config.device_id.clone();

                        // Spawn a lightweight asynchronous Tokio task for each device
                        let handle = task::spawn(async move {
                            match device_config.device_type {
                                DeviceType::BP => {
                                    simulate_bp_device(client_clone, device_config, config_clone).await;
                                }
                                DeviceType::Dialysis => {
                                    simulate_dialysis_device(client_clone, device_config, config_clone).await;
                                }
                            }
                        });

                        // Store the task handle in a thread-safe DashMap so we can kill it later
                        sims_map_clone.insert(device_id, handle);
                    }
                }
                SimulatorCommand::Stop { stop_simulations } => {
                    info!("Received STOP command for {} devices.", stop_simulations.len());

                    for device_id in stop_simulations {
                        // Find the running task and safely abort it
                        if let Some((_, handle)) = running_simulations.remove(&device_id) {
                            handle.abort();
                            info!("Stopped simulation for device: {}", device_id);
                        }
                    }
                }
            }
        }
    }
}
ReBAC and The "Care Network"
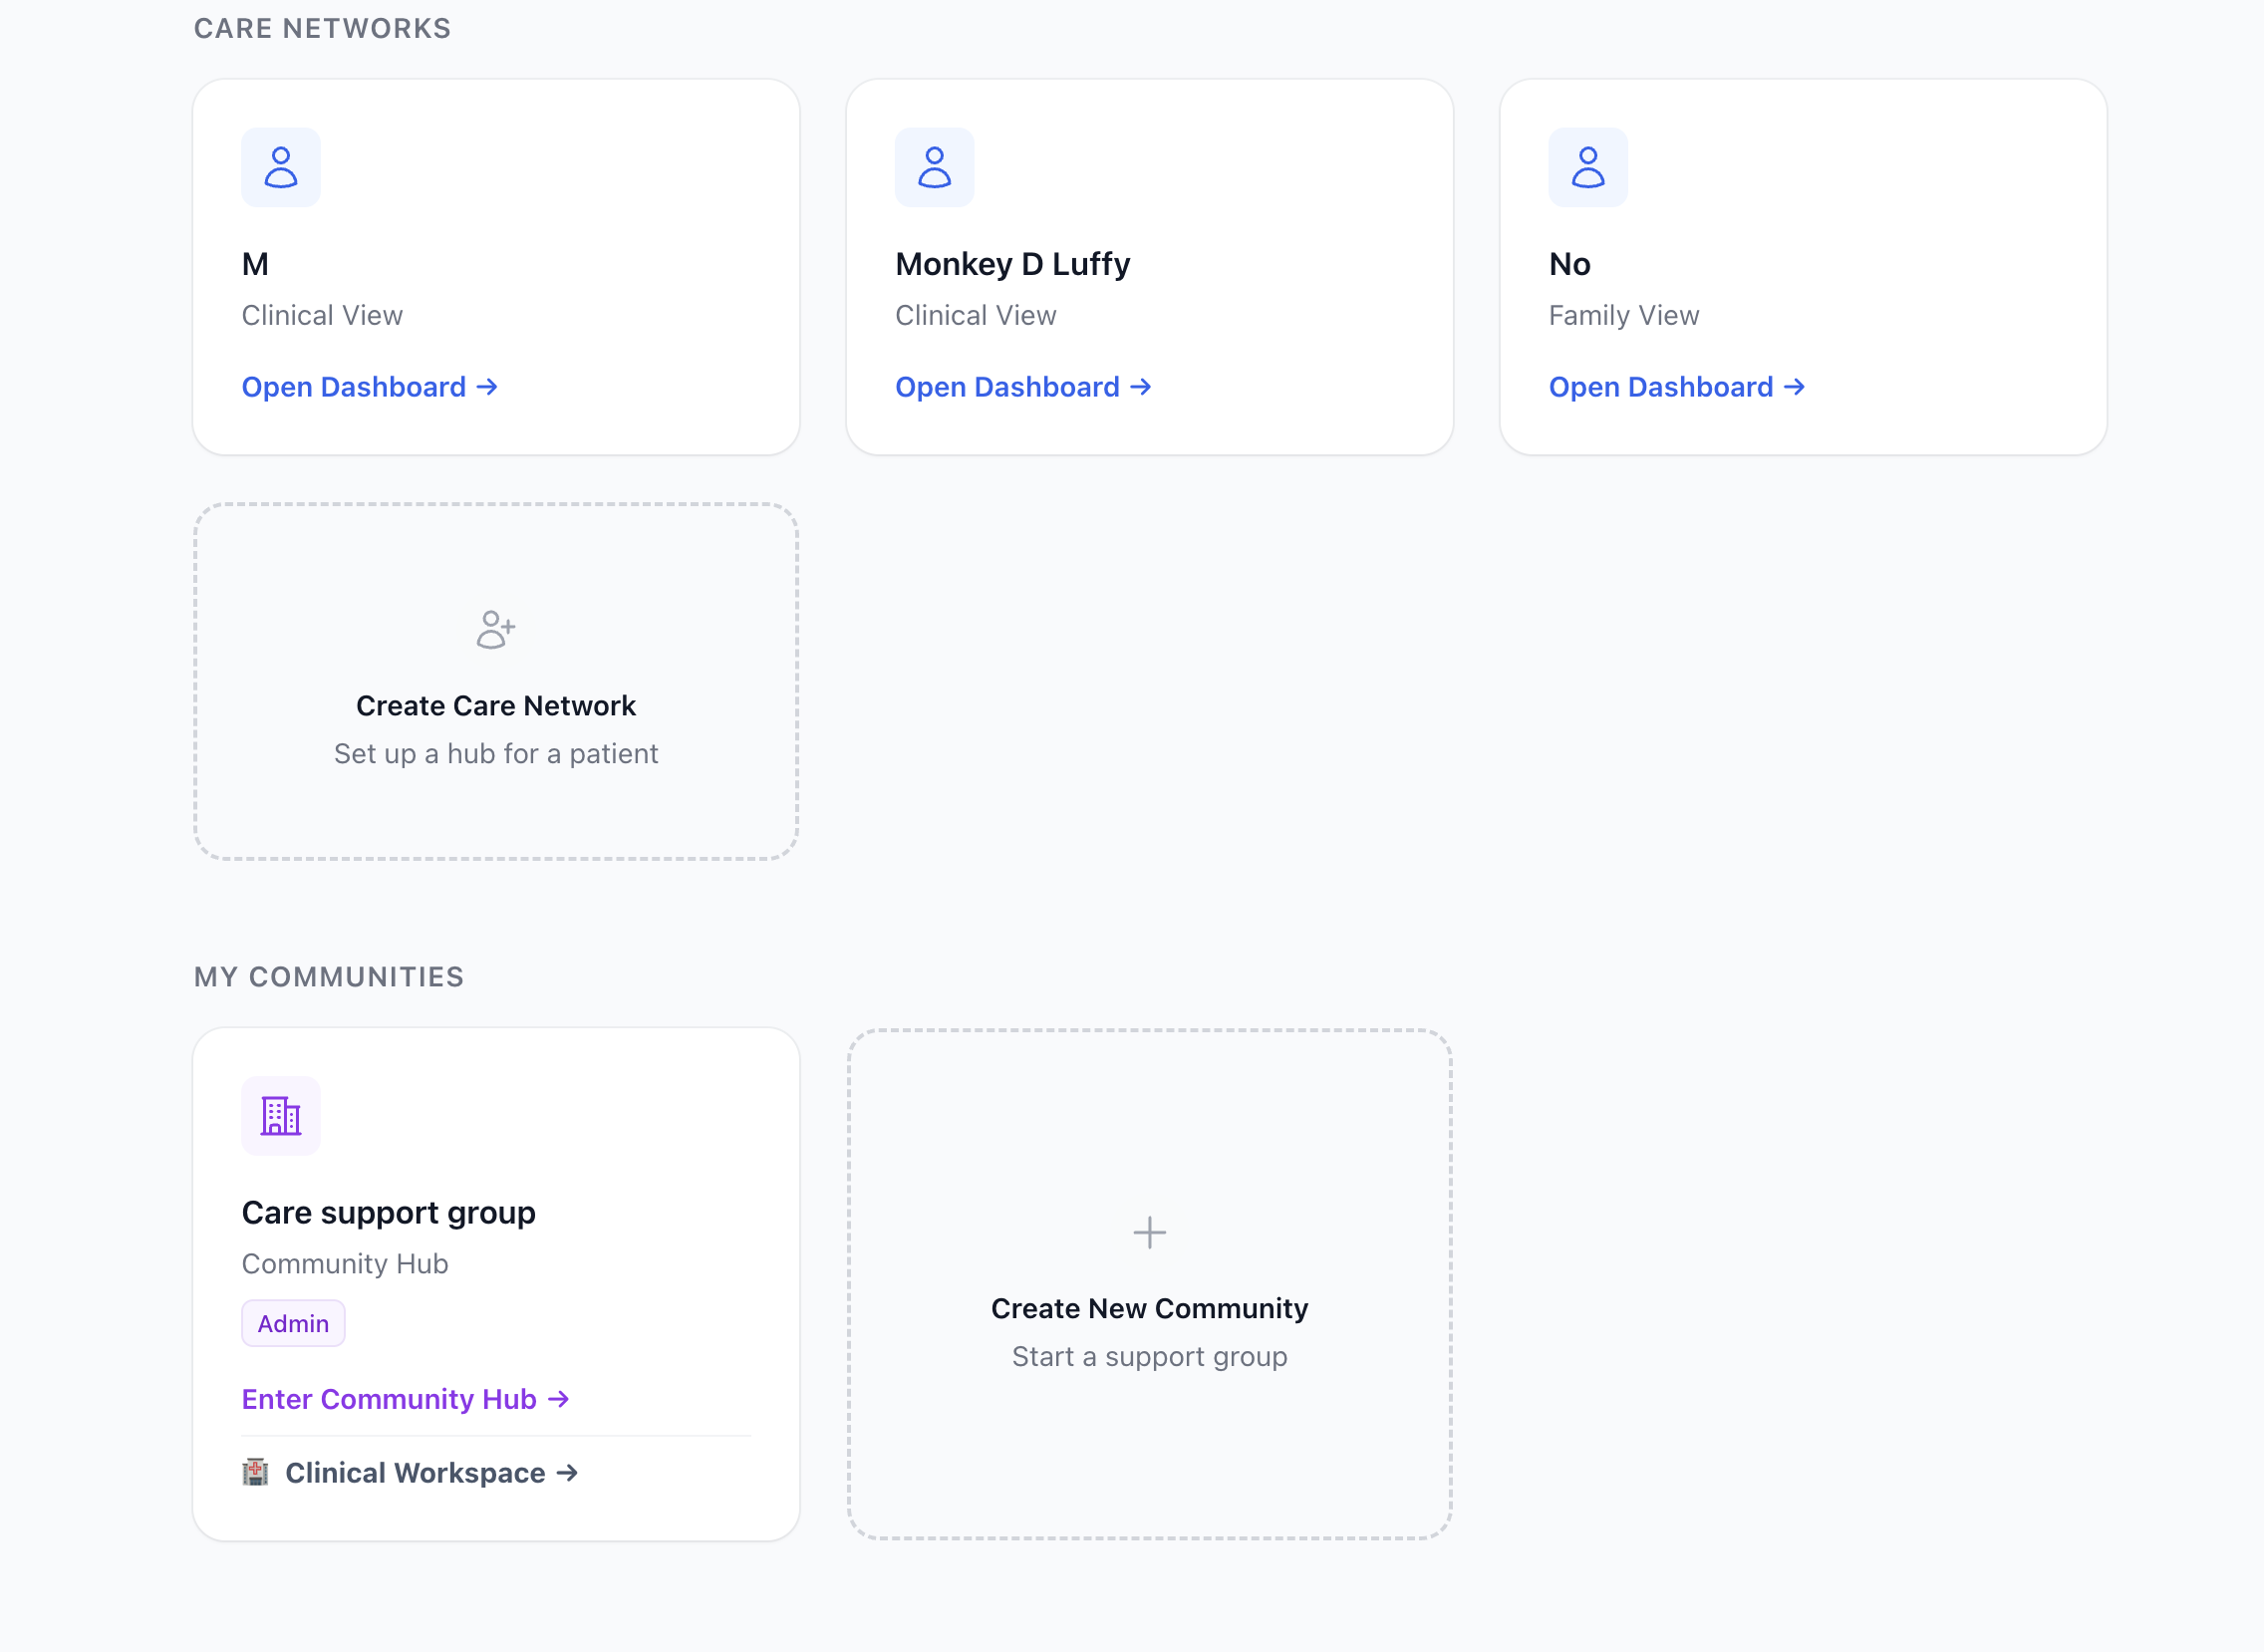
To silo patient data I isolated each patient using the hub and spoke
model creating patient hubs. The patient or their primary caregiver can
create a hub centered around various levels of access to the patient
based on the role they have.
 Note: Disregard the "Clinic" entry — communities are not yet filtered
by NPI, so clinic-managed hubs and user-created communities appear the
same in this view.
Note: Disregard the "Clinic" entry — communities are not yet filtered
by NPI, so clinic-managed hubs and user-created communities appear the
same in this view.
The views for members, or spokes, of the patient hub changes depending
on their relationship. The views inform the capabilities of each user,
meaning a doctor and a caregiver have different dashboards. The views
also map to the access level users have in a hub.
 This allows a doctor to be an admin for Patient A, a viewer for Patient
B, and completely unauthorized to see Patient C. It also allows us to
build reciprocal peer-to-peer support links between two patients
securely.
This allows a doctor to be an admin for Patient A, a viewer for Patient
B, and completely unauthorized to see Patient C. It also allows us to
build reciprocal peer-to-peer support links between two patients
securely.
Here's a look at how these relationships are mapped
# 1. The Hub: The Patient Schema
schema "patients" do
  field :name, :string
  # The creator/owner of this specific hub
  belongs_to :owner, Ankaa.Accounts.User

  # The Spokes: Users invited to this specific Care Network
  has_many :memberships, Ankaa.Patients.CareNetwork
  has_many :members, through: [:memberships, :user]
end

# 2. The ReBAC Bridge: The CareNetwork Join Schema
# This table strictly defines WHO can see WHAT and WHY.
schema "care_networks" do
  belongs_to :user, Ankaa.Accounts.User
  belongs_to :patient, Ankaa.Patients.Patient

  field :relationship, :string # e.g., "Mother", "Primary Nephrologist", "Peer"
  field :role, Ecto.Enum, values: [:caresupport, :doctor, :clinic_tech]
  field :permission, Ecto.Enum, values: [:owner, :admin, :viewer]
end

# 3. The Logic: Safely associating a user to a patient's network
def create_patient_association(%User{} = user, %Patient{} = patient, relationship, role, permission \\ :viewer) do
  %CareNetwork{}
  |> CareNetwork.changeset(%{
    user_id: user.id,
    patient_id: patient.id,
    relationship: relationship,
    role: role,
    permission: permission
  })
  |> Repo.insert()
end
Using this architecture, building a "Clinical Roster" view for a
hospital is trivial. We simply query the care_networks table for all
patients where the current user has the :doctor role, completely
guaranteeing tenant isolation at the database level.
Instead of globally assigning a user the "Doctor" role, we use Ecto to create a rich join table. This join table defines the exact relationship, role, and permission level that a specific user has to a specific patient.
LiveViews
Traditional websites are built as multi page applications (MPAs). Think
wikipedia. Every time you click a link, your browser loses all context
of what it knows and sends a new HTTP GET request to the server. The
server computes the page then sends the new HTML to the browser. This
architecture is very simple, secure, scalable, and SEO friendly.
Painting
the browser this way however can feel slow, as you need to load the
entire HTML document from scratch, and you will often see a white flash
between page loads.
To fix that white flash, we got React and the Single Page Application (SPA). The server sends you one blank HTML page and a massive bundle of JavaScript. When you click a link, the browser does not ask the server for a new page. Instead, React intercepts the click, quietly asks the server for raw JSON data via an API, and physically redraws the screen itself. It also fakes the URL change using the browser's History API.
This feels very fast. You can use loading skeletons to render areas waiting on server data, making navigation feel seamless. But the cost is large. You have to write complex frontend logic to manage state in the browser, while building an entirely separate backend to feed it data. (Unless you use Next.js, which attempts to blur this line by hiding the backend behind opaque patterns that will probably get you where you are trying to go...)
With LiveViews you get the best of both worlds.

It defaults to the traditional MPA architecture we discussed earlier,
losing context based on page routing. The LiveView magic is that you
do not reestablish a connection when using <.link navigate={...}>.
LiveView intercepts the click and prevents the hard refresh. It
pushes a tiny message over the open WebSocket saying, "The user wants
to go to /patient/123." Your Elixir server catches that message, runs
its internal router, mounts the new page, computes the HTML diff, and
pushes it back down the WebSocket. The browser updates the screen and
changes the URL bar without ever dropping the connection. (Though, as a
developer, this means you do have to consciously decide when to keep the
WebSocket open versus using a standard href to force a hard reset).
Because WebSockets act as the HTML transport layer, as opposed to standard REST calls in React, we get realtime features for free at the cost of server resources. If each connected user holds an open socket we end up trading horizontal scalability for simplicity. However, the UI is just a pure function of the server state, there is no need to manually sync client state with server state, and there is no massive JavaScript bundle to download, nor a separate API to maintain for the frontend. This allowed me to build an interactive, real-time dashboard that feels like a React SPA, but with the simplicity and speed of a traditional server-rendered application.
Since every interaction relies on a persistent WebSocket connection, you are bound by the net. If a user has a spotty cell connection, or you are building a highly complex, drag-and-drop client interface, the server round-trip latency becomes noticeable.
To make up for their weaknesses, pairing Phoenix and InertiaJS makes a lot of sense. Going forward, if I am building large applications in Phoenix, this is probably the pattern I would choose. Phoenix components built around LiveViews and streams for real time data and React/Svelte components via Inertia JS for high-fidelity client interactivity.
Terraform, HIPAA, and AWS
I am not a DevOps engineer. I don't want to be a DevOps engineer. I just want to build a cool health-tech project. The BEAM's concurrency and fault-tolerance features are amazing, but if I had to manually wire up servers, load balancers, and databases I would probably never have jumped off a bridge. Thanks to Terraform, I was able to define my entire infrastructure as code in a single file and deploy it with one command.
The stack is a standard three-tier VPC: public subnets for the ALB and
NAT gateway, private subnets for the app, and fully isolated database
subnets for RDS. A single t4g.small ARM64 EC2 instance runs the
Phoenix app and Rust simulator as Docker Compose services, sitting
behind an Application Load Balancer that terminates TLS and redirects
HTTP to HTTPS. RDS Postgres runs on a db.t3.micro in the private
database subnet with encryption at rest, forced SSL connections, and
deletion protection on. IoT certificates for the Phoenix backend and
Rust simulator are provisioned through AWS IoT Core and stored in
Secrets Manager, with IAM roles granting the EC2 instance pull access
to ECR and read access to those secrets. SSM replaces SSH entirely, so
there are no key pairs to manage. A budget alert fires at 80% of a $50
monthly cap before I get surprised.
The infrastructure is HIPAA-influenced, not HIPAA-certified, meaning encryption at rest and in transit, private subnets, no public DB exposure, and forced SSL get you most of the way there for a prototype,along with a BAA, but I have not gone through a formal audit or implemented all the administrative safeguards. For a production health-tech product, I would absolutely invest in a full HIPAA audit and certification process, but for a personal project, I focused on the technical controls that I could implement.
The biggest deployment headache was the ARM64 architecture. Elixir does
not cross-compile cleanly, so you cannot build the Docker image on an
x86 machine and expect it to run on a t4g. You have to build the
image on an ARM64 host. I also had to manually verify the EC2 and RDS security group
rules were actually wired up after apply. Terraform said it was done
but the connection wasn't live until I confirmed it in the console.
Wrapping up
Safehemo started as a personal project to solve the "silent alarm" problem in home hemodialysis. When dealing with medical telemetry, you can't afford dropped connections or missed alerts.
By leveraging the BEAM's fault tolerance, Phoenix LiveView's real-time simplicity, and Rust's raw concurrency for IoT simulation, I was able to build a resilient, distributed care network without drowning in infrastructure or JavaScript fatigue.
The natural evolution of this project is moving from simulated telemetry to real-world hardware.
-
Edge Computing: I plan to explore embedded Elixir (via the Nerves framework) so this exact stack can run natively on the physical medical devices, offloading data processing to the edge.
-
Wearables: Integrating the ingestion pipeline with consumer Bluetooth devices, like continuous blood pressure monitors, to give care networks an even clearer picture of patient health during dialysis.
Safehemo is completely open-source. If you are working in health-tech, building IoT pipelines, or just love the Erlang/Elixir ecosystem, I would love to connect and hear your thoughts.
You can check out the source code here: